skip to main |
skip to sidebar
Ready, Steady, Cook used to be one of the cookery-cum-gameshow programmes that I watched with great enthusiasm in those far-off days when I was unemployed (on the insistence of the Home Office in the UK, I should add, and not because I was too lazy to work) and had lots of time on my hands. At that time I was unfamiliar with most British TV productions, actors, celebrities and shows – not to mention, show formats - so it was all new to me.
I still remember how horrified I was by Anne Robinson’s incredible rudeness to the participants on her quiz show, The Weakest Link, the first time I watched it. I couldn’t imagine anyone from other quiz shows I’d seen thus far – say, Mastermind UK, or Mastermind in India (with Siddharth Basu) – being so rude and getting away with it. And there didn’t seem to be any real reason for such personal attacks on what was meant to be a cerebral show. It took a while for me to realise that it was only a gimmick with Anne Robinson (ah, those days of innocence) and she was probably not as evil in real life... but the whole thing still took some getting over. Certainly, there was no way I could have faced that level of nastiness with the equanimity displayed by her victims, had I been a contestant.
Equally, I also still remember how instantly I was drawn to Ainsley Harriot’s goofy good looks, ebullient personality and permanent good cheer on Ready, Steady, Cook. The show format was also something I’d never seen before, and I was totally impressed by the amazing spur-of-the-moment decisions by the chefs on the show to make this recipe or that recipe based on what was in the bags they were given. Oh, for those days of innocence... I didn’t realise that it was all rehearsed and the chefs most likely knew what food items they were going to get from the contestants and, therefore, very likely also knew what they would be making with it.
This I discovered only during the application process for the show, when a very dear friend, Ammani (who’s way more enterprising, energetic, enthusiastic and extroverted than I could ever hope to be) persuaded me to apply to the show as a participant along with her. We had to fill out forms telling them about ourselves, our interests, our achievements thus far, and so on. I guess this was to see if we would be interesting enough for the show (and I really do feel that the reason we didn’t make the show was my exhaustive list of non-achievements. Had Ammani gone for a different partner, it would have been a cinch for them.)
Anyhow, along with our life stories, we also had to list the ingredients that we would be bringing along for the chefs, assuming we met the show’s criteria. A-ha! That was when the penny dropped for me - and that was when all the chefs that I collectively admired so much collectively cracked at their weak point and collectively toppled off their pedestals, leaving behind only their feet of clay. (Most of them eventually clambered back on, but the pedestals were only footstools and their feet remained clayey.)
But like I said, in the beginning it was all new to me, and I watched the chefs with a level of awe that they probably didn’t totally deserve, taken in by what I thought was unrehearsed improvisation, watching the recipes they made – and all in just 20 minutes cooking time! The level of energy was always high, given the time constraints, and Ainsley Harriot's presence made the show all the more lively.
Another thing I came to realise as I watched episode after episode was that the recipes weren’t really new, as such. Perhaps they differed a little in their list of ingredients (compared to the classic originals on which the chefs based their recipes), but that was all, and the differences only arose because of what they were given to work with. There were staple recipes from various cuisines – stir fries, bhajis, curries, casseroles, etc – which featured again and again.
I’m not complaining, really. It was just something that came as a slightly surprised realisation. For instance, the classic fish-and-chips, with salt and vinegar and mushy peas on the side, would be re-marketed by a chef as “posh fish and chips” on the show – maybe the chips would be sprinkled with rosemary, or instead of deep-fried chips they would have pan-fried potatoes, or add herbs to the mushy peas, etc and so on. And definitely the plating would be as showy as possible, to accentuate the difference between the regular stuff dished out by your corner chippie and the chef-cooked posh fish-and-chips.
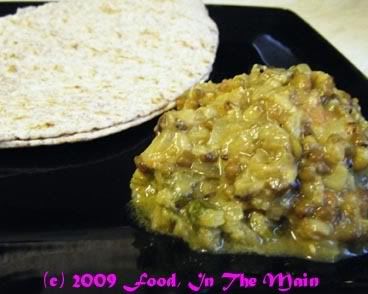
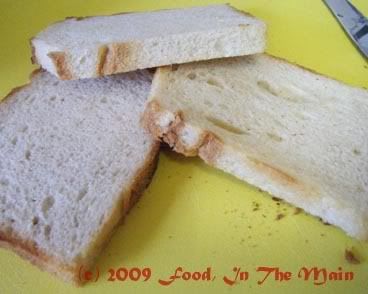
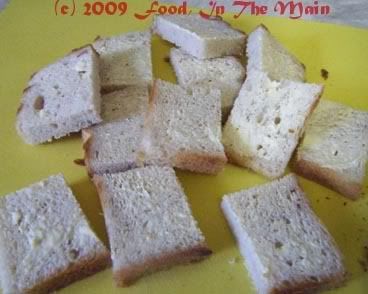
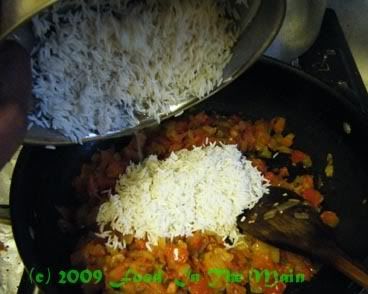
And thus, gentle reader, I finally, finally come to the point of this post – my recipe today, which is for “posh” bread upma. It’s posh because I didn’t use ordinary bread... instead, I made use of some whole-wheat walnut pave loaf and some stone-baked boule which were left over from the previous day’s meal.
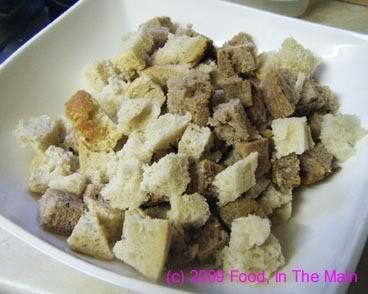
They did make a difference, because using good bread always makes a difference. You can make bread upma with ordinary sliced white bread from your local Tesco, and it will be edible - but as like as not, the bread will not hold its own against the rest of the masala that makes up this dish, simple though the masala is.
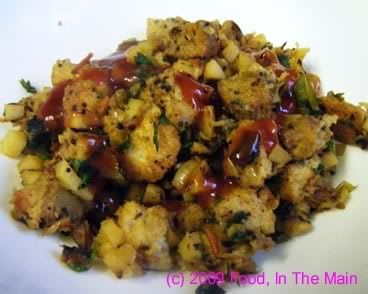
I know, I know... you’re probably wondering why this fuss over bread upma, a perfectly common dish that requires no specialty ingredients or cooking process – just stale leftover bread as the base. But bread upma is a really savoury, very delicious quick meal when you’re short of ingredients and time. You can make it as basic as you like or jazz it up – and mine is sort of poshed up. Seriously, though, the bread I used took on the flavour of the masala but didn’t itself turn to mush. It retained some bite and the small pieces of walnut only added to the upma's overall yumminess.
Stale bread is preferable for this dish, because of its firmer texture. But stale good quality bread is best, because it really makes this dish posh. In the style of Ready Steady Cook, anyway.
Recipe for: Posh bread upma
Ingredients:
4 cups stale good quality bread, cut into bite sized cubes (I used walnut bread and stone-baked crusty boule)
5-6 salad potatoes, chopped into small cubes
2 medium tomatoes, chopped
2 onions, chopped
1 small leek, chopped
5-6 fresh green chillies (or to taste), sliced into thin rings
3 tbsp yogurt (I used low-fat Greek yogurt)
1/2 tsp turmeric powder 1/4 tsp asafoetida powder (optional)
1 tsp mustard seeds
1 tsp cumin seeds
a few curry leaves
1 tbsp oil
Salt to taste 3-4 tbsp roughly chopped coriander leaves for garnish
Method:
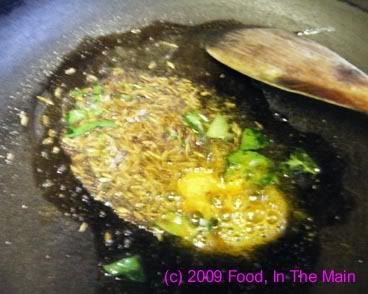
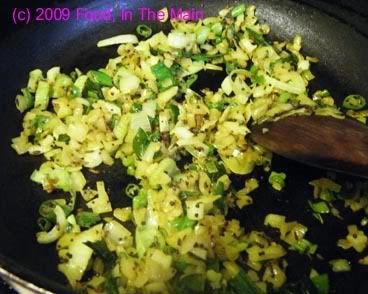
1. Heat the oil in a wide-bottomed pan and add the green chillies, curry leaves, cumin seeds and turmeric powder and asafoetida and mustard seeds. Cover the pan and let the mustard seeds pop.
2. Add the chopped onions and leek next,
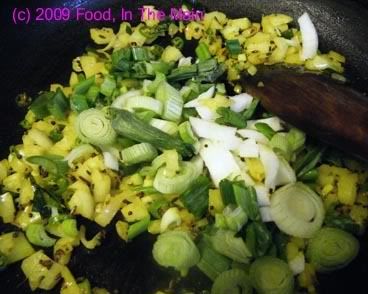
stir well and cook on a medium high flame till the onions soften and turn translucent and the leek has wilted.
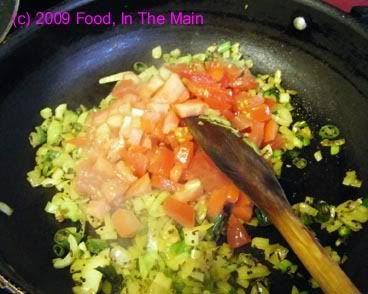
3. Now add the chopped tomatoes and cook till they soften and break down.
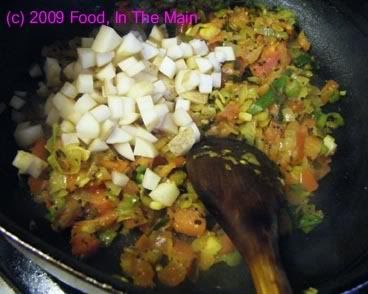
4. Next, add the cubed potatoes, stir well, cover and cook till the potatoes are done. Salad potatoes retain their shape even when cooked, but if you're using floury or mealy potatoes, make sure they dont break down completely.
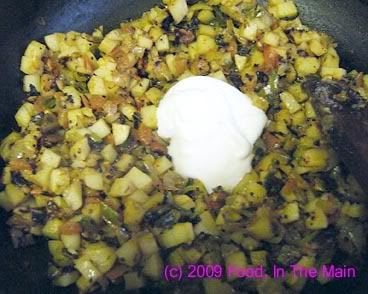
5. When the potatoes are cooked, stir in the yogurt. Turn the heat up and stir-fry for 2 minutes, till the moisture from the yogurt reduces.
6. Add salt to taste and mix well. (Remember that the bread will have salt in it, so dont over-salt the masala). Add the bread now and mix carefully till the masala coats the bread evenly. 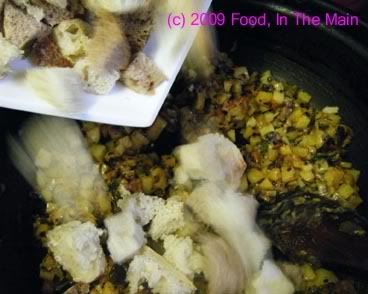
7. Turn the heat to medium-low and fry the bread with the masala till it starts to crisp up a little at the bottom.
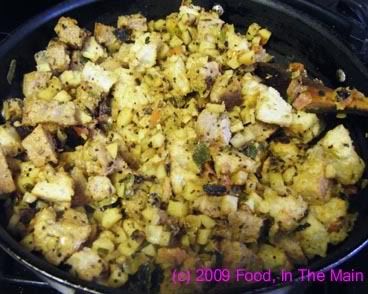 8. Sprinkle the coriander leaves, mix it all with a wide spatula and serve hot with tomato ketchup.
I’m sure everybody has an inner lazy person, but for most people, they stay firmly anchored on the inside. Whereas, with me, my inner lazy person has always been keen to remain on the outside and experience everything that comes my way. Occasionally my brisk and hard-working persona makes a visit to the outside, but on the whole those are rare occasions and the brisk inner me prefers to remain unseen. Come to think of it, perhaps the brisk inner me is actually the lazy inner me. Intriguing....
Or possibly not.
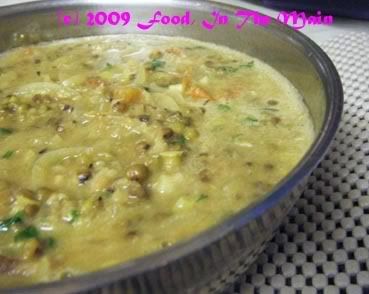
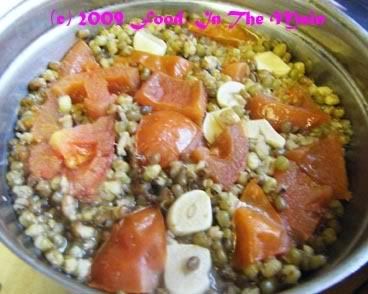
Anyway, grains and legumes that don’t need pre-soaking before use are excellent for the lazy cook (inner or outer persona, whichever), which is why whole green gram dal is a favourite with me. I feel it’s a homely sort of dal, and I’ve not seen it on many party menus or dinner menus for guests. There’s not much to making this dal, but only if you have a pressure cooker. Then it is a doddle. Since I haven’t bothered to cook whole green gram dal on the hob by boiling, I’ve no idea how long it might take. (I don’t like the idea of wasting fuel cooking most dals, legumes or beans by boiling, when I have a trusty pressure cooker that does the job in a jiffy. The few exceptions are quick-cook dals like split masoor or chana dal when I don’t want them mushy.)
The basic recipe I use for making this dal is just that – basic. Throw a couple of chopped tomatoes, chillies, garlic along with ½ cup green gram dal into a vessel, add water to cover, and pressure-cook for 3-4 whistles. Then it’s just a question of doing the tadka or seasoning, with or without fried onions, and voila! the dish is finished and ready for consumption.
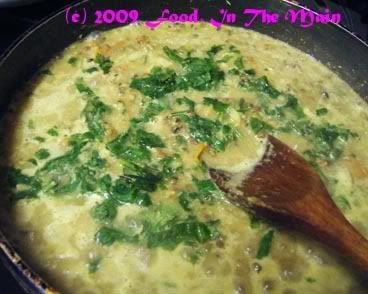
This time too, I used the basic recipe to cook the dal, but upped it a notch by making a wet coconut masala for the seasoning. It tasted just fine... but I still would probably not consider this a dish for special occasions. It’s more an everyday dal with not much exotic about it. For Indians, at any rate.
Click here for another recipe using green gram dal
Recipe for: Green gram dal - 2
Ingredients:
1/2 cup whole green gram dal
2 medium tomatoes, chopped
3-4 green chillies (or to taste), slit
2 cloves garlic, chopped
2 medium onions, sliced thin
2 htbsp fresh coconut, grated
1 tsp coriander seeds
1 tsp cumin seeds
1/2 tsp garam masala
1 tsp oil
Salt to taste
Fresh coriander leaves, chopped, for garnish
1-1/2 cups water
Method:
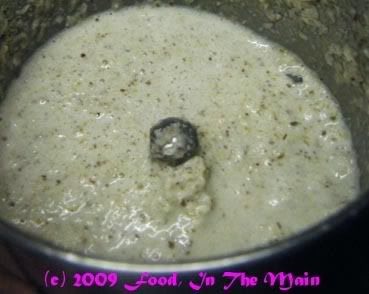
1. Grind the coconut, coriander seeds and cumin seeds to a fine paste using 3-4 tbsp very warm water. Reserve.

2. Place the uncooked green gram, chopped tomatoes, slit chillies and garlic in a vessel and cook in a pressure cooker for 3 whistles. Remove when pressure drops naturally.
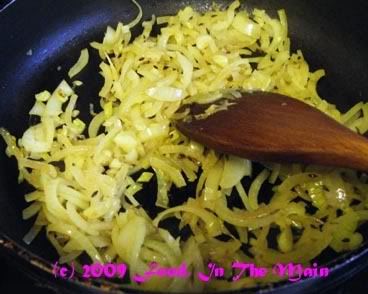
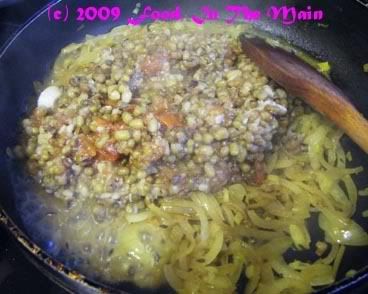
3. Heat the oil in a pan and fry the sliced onions till they turn soft and translucent.
4. Add the cooked green gram dal mixture along with 1/2 cup water (add more if there isnt much moisture in the cooked dal) and stir well. Add salt to taste along with garam masala and bring the mixture to a gentle simmer. Cook for 3-4 minutes.
5. Now add the ground coconut masala
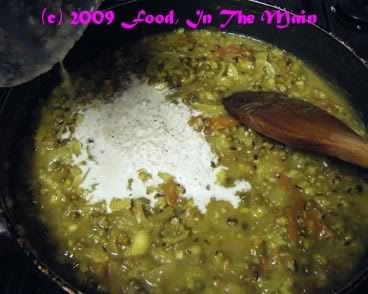
and stir it in.

6. Simmer the dal for 3-4 minutes more (don't boil it), then add the chopped coriander.
7. Serve hot with chapaties or over plain rice.
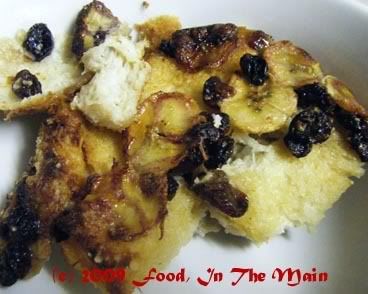
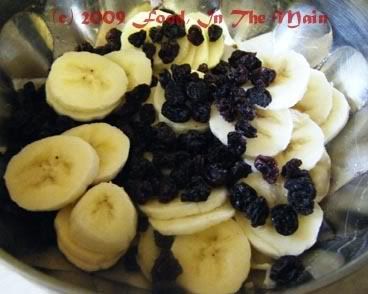
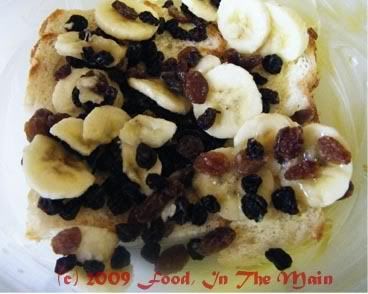
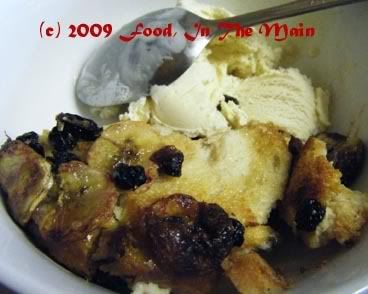
The nice thing about this bread-and-butter pudding is that it needs only 1 tbsp sugar – the natural sweetness of bananas, sultanas and currants more than suffices, especially for those without a sweet tooth the size of Ayers Rock. And if you don’t wish to use even that 1 tbsp sugar (mainly to sprinkle on top, for caramelisation purposes), well, this becomes an entirely processed-sugar-free recipe. Not bad for a dessert, is it? Serve this pudding with sugar-free or low-sugar icecream, or light cream, and the sin points still wouldn’t add up as much as from, say, a slice of frosted chocolate cake with cream.
Pete, as usual, doesn’t like desserts which combine eggs and milk – even if the end result isn’t as custardy as custard-from-scratch. To his credit, he did try a spoonful of this banana bread-and-butter pudding and pronounced it “very tasty”… but it still didn’t encourage him to go for a separate portion of his own. Which is okay, because I’ll get to have this over the next 4 days. It makes for a pretty small(ish) pudding – three reasonable servings, or four small ones, or two large greedy ones. All without the addition of icecream, that is.
It would be best to use slightly overripe bananas in this recipe, as there is no extra sugar added (worth saying again, I think!). Served warm, this pudding is really rather nice on a cold evening. Recipe for: Banana bread-and-butter pudding
Ingredients:
4 slices bread
1 tbsp butter
3 tbsp sultanas
3 tbsp currants
1 large ripe banana, sliced
1 tbsp demerara sugar
1 tsp vanilla extract
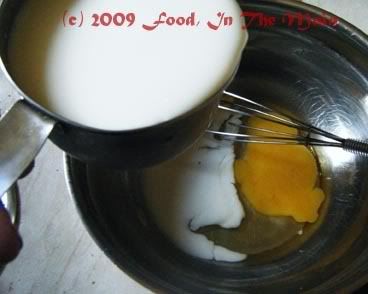
1 egg
1 cup (225ml) milk
Method:
1. Beat the egg and milk together with the vanilla extract. Reserve.
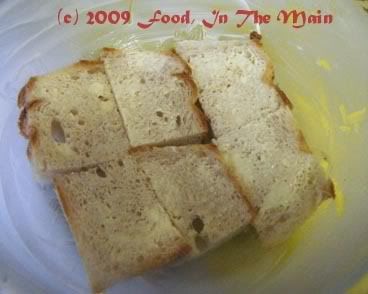
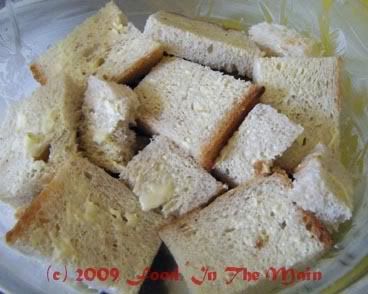
2. Cut the crusts off the bread.
3. Lightly butter one side of each slice and cut each slice into four.
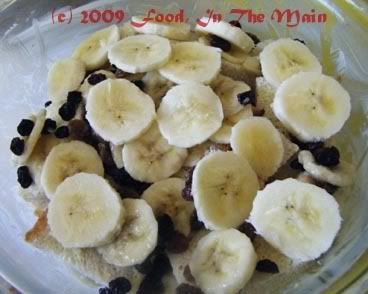
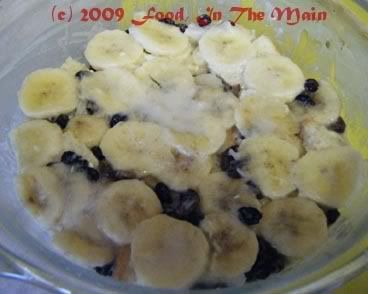
4. Mix the sliced bananas with the sultanas and currants.
5. Butter a 1-litre baking dish lightly. Arrange half the pieces of bread, buttered side up, in the bottom of the baking dish.
6. Spoon half the banana-sultana mix over the bread.
7. Pour half the milk mixture over this, making sure to cover all the bread. Sprinkle 1/2 tbsp demerara sugar over.
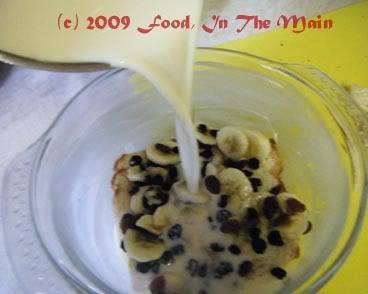
8. Layer the remaining pieces of bread, buttered side up again,
then the remaining banana slices,
and pour the rest of the milk over.
Sprinkle the remaining 1/2 tbsp of demerara sugar over the top.
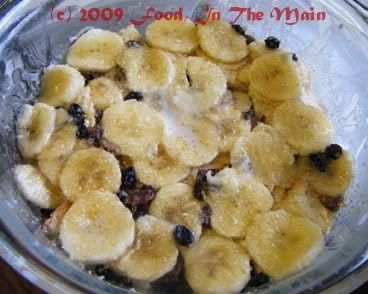
9. Press down gently and evenly to make sure that the bread pieces are all covered by the milk. Allow to soak for at least 30 minutes in the fridge.
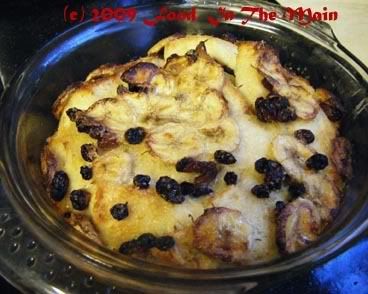
10. Heat the oven to 180C and bake the pudding for 30-40 minutes or till the top layer of banana pieces are caramelised and the bread turns golden brown.
11. Serve warm as is, or with ice-cream or cream, if preferred.
Readers of this blog (mainly those who, like me, have an unfortunate tendency to remember boring and useless trivia on random topics/people) will probably know that I like the presence of coconut only in certain dishes and then only the way I’m used to it being made at home. Pieces or chunks of coconut in anything are a definite NO, coconut in sweets and cakes is pretty much no-thanks, and the presence of coconut in dishes where I do not like or expect coconut (such as in potato podimas or adai, sprinkled on dhokla or plantain fry, etc) is also not encouraged or particularly welcome in the super-exclusive club that is my mouth (its motto being “All rights of entry reserved. Strictly no admittance to aubergines or dead animal products. All coconut products will be vetted beforehand”).
As far as I’m concerned, coconut has to be finely grated – always, in dry dishes – or ground to a smooth paste, if it’s a gravy dish or thogayal/chutney.
So it shouldn’t come as too much of a surprise, then, that I’m not a fan of coconut milk – or, for that matter, elaneer or tender-coconut water, despite its reported refreshing qualities in the heat of summer and all that. (I’ll take a bottle of cold water any day.) Coconut milk to me is always associated with a sickly-sweet sort of taste. That said, though, I have tried it in Thai dishes (not made by me, though) and even cooked with it myself once or twice. Truth to say, although they would never be my first choice, the dishes did turn out better than average.
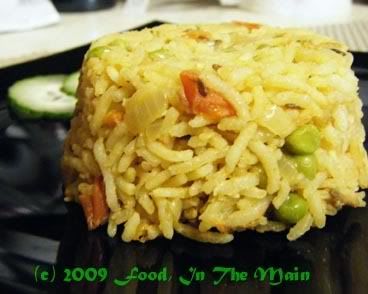
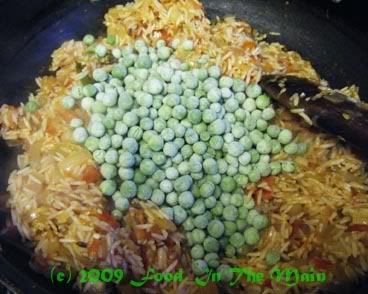
This is possibly the third time ever that I’ve used coconut milk, this time to make another version of tomato rice. Since I do like tomato rice, and I didn’t use too much coconut milk (and it was pretty thin coconut milk at that), it turned out better than better-than-average. In fact, I might even go so far as to say that it was pretty darn good. The tomato rice didn’t taste overwhelmingly of coconut milk, and the presence of coconut milk didn’t negate the presence of the spices/seasonings used, which is how I like it.
The rice was rich without being overly unctuous... although I have to admit that when it was cold, it had a greasy sort of mouth-feel (obviously because of the fat in the coconut milk, even watered-down as it was). That was not a pleasant experience for me or my tongue – only by the somewhat dubious virtue of me being me and my tongue being my tongue. When the rice was re-heated though, it wasn’t a problem.
Recipe for: Rich tomato rice
Ingredients:
1 cup basmati rice, washed, soaked in cold water for at least 15 minutes
3-4 fresh green chillies (or to taste), slit
1 tsp ginger, grated
1 tbsp sesame seeds
1 tsp cumin seeds
1/2 tsp turmeric powder
1 medium onion, chopped
3 medium tomatoes, chopped
1/2 cup frozen green peas
1 cup coconut milk (diluted to taste)
1/2 cup water
Salt to taste
1 tsp cooking oil
Method:
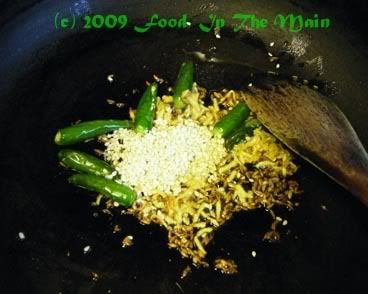
1. Heat oil in a pan (which has a tight-fitting lid), and add in order: green chillies if using, cumin seeds, grated ginger. Fry for 30 seconds, then add sesame seeds.
2. Stir for 30 seconds, and once the sesame seeds start popping, add the chopped onion.
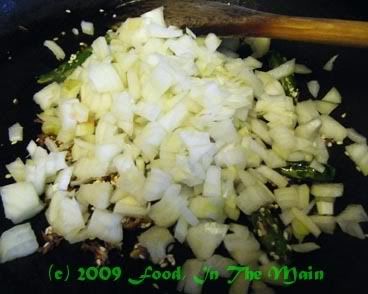
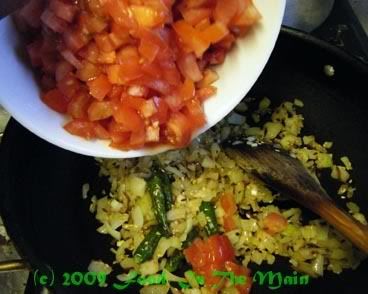
3. Add turmeric powder now, and stir-fry till the onions turn soft and translucent. Then add the chopped tomatoes. Cook on medium heat till the tomatoes start to soften and break down.
4. Drain the soaked basmati rice and add it to the pan.
5. Stir well, turning up the heat to high, and keep stirring till any excess water evaporates (3-4 minutes, and the rice will start to clump together.)

6. Add the frozen green peas and stir till mixed with the rice and masala.
7. Add the coconut milk now, and the 1/2 cup of water.
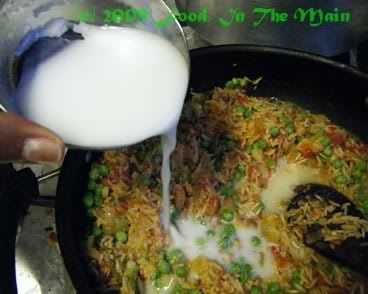
Add salt to taste, then stir well. Bring the liquid to a brisk boil, then cover the pan with a lid (you can put a clean tea towel under the lid to absorb the steam, just make sure that the ends of the cloth don't trail down near the flame!). Turn the heat down and let simmer for 15 minutes. Then turn off the heat and let the rice sit undisturbed for 15 minutes. After that, take off the lid and fluff the rice gently with a fork.
Or if you're using a pressure cooker, let it come up to two whistles after maximum pressure, then turn off the heat. Open when the pressure drops.
Serve hot with a chilled raita.
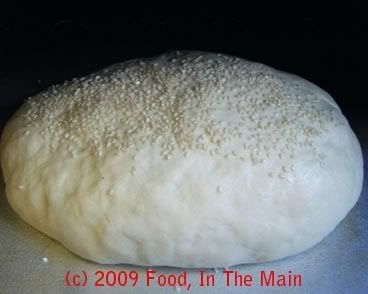
I made this bread quite a while back, while in the grip of severe “baking bread from scratch” fever. That’s how these things get me – I start out all fired up, rather like a milk cooker which has lost its pressure valve and therefore can’t regulate the outlet of excitable steam and therefore bubbles over when the enthusiasm level heats up too much… and then the fire goes out.
Ideally, what I need is some sort of pressure valve that will let off the excess enthusiasm, or at least regulate the letting off of it so that it doesn't bubble over and extinguish itself...
How about that, I’ve just had an epiphany in front of everybody!
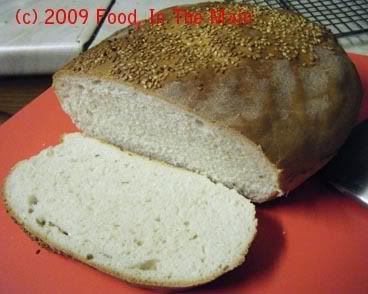
Anyway, I’m not really sure what makes this a Greek white bread, but that’s what the recipe said when it popped into my inbox, and that’s what I’m saying as well. Maybe it’s the olive oil? But the Italians and Spanish use olive oil too, so maybe not. Well, whatever. After all, What’s in a name? That which we call a bread by any other name would taste as sweet (sorry, Shakespeare) – or as nice, at any rate. This bread isn’t sweet, but it IS nice.
PS. The fire hasn’t actually gone out as regards baking bread by hand… but it has fizzled a little. I’m sure something will occur to turn the heat up again, and then just watch out! The bread will rise again.
Recipe for: Greek white bread
Ingredients:
3-3/4 cups of strong bread flour
1 1/2 cups of lukewarm water
2 tsp dry yeast
2 tablespoons of olive oil
1 teaspoon of salt
water for brushing
sesame seeds
Method:
1. Dissolve yeast in the warm water.
2. In a mixing bowl, combine 1-1/2 cups of flour, salt, oil, and yeast with water, and mix until thoroughly blended.
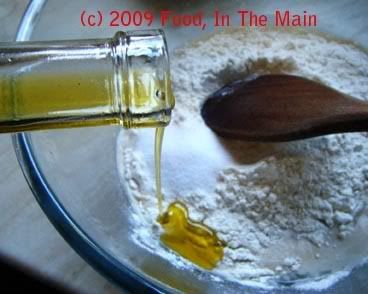
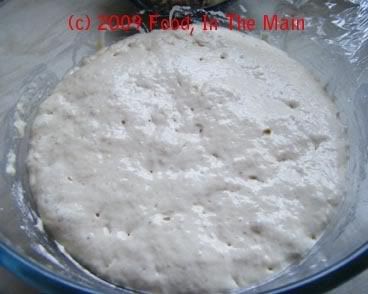
Cover tightly with plastic wrap and let sit for 30 minutes in a warm, draught-free place till it's somewhat bubbly.
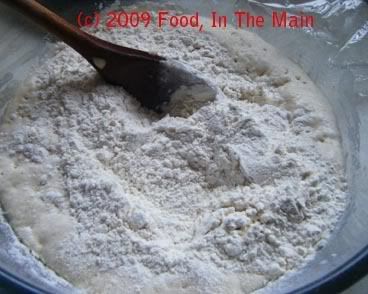
2. Add 1-1/2 cups of flour to the yeast mixture and combine with hands to form a cohesive dough.
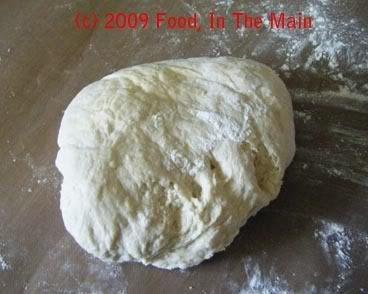
3. Turn out onto a floured work surface and knead in as much of the remaining flour as needed until the dough is smooth, elastic and non-sticky.
4. Shape into a loaf

brush with water and sprinkle sesame seeds on top.
5. Put the shaped loaf on a nonstick cookie sheet, and place on the middle rack in a cold oven for 15 minutes.
5. Turn on oven to 425°F (220°C) and bake on the middle rack for 30 minutes or until golden. Let cool before slicing.